

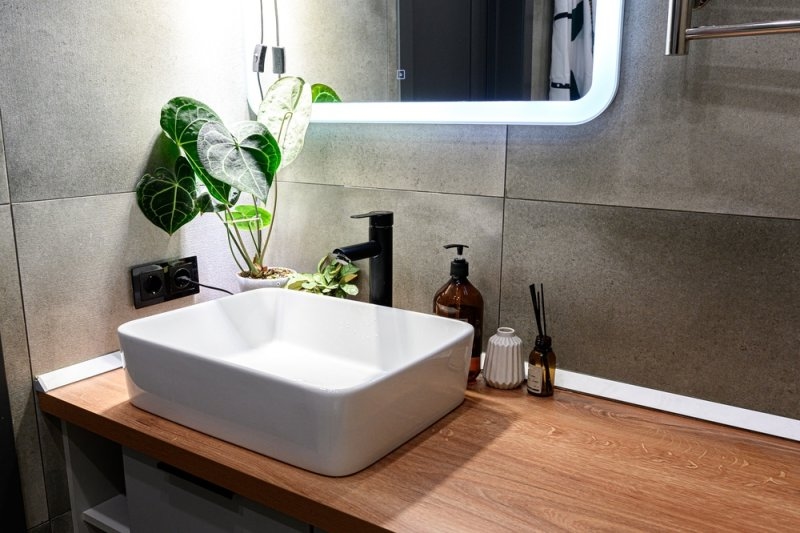
A vessel sink can take a boring vanity and make it look sharp in just a few steps. Because the bowl sits above the counter, it creates a clean, intentional vibe. But it’s the installation that makes or breaks a project like this. If you line up the drain wrong, leave the faucet loose, or skip sealing, you’ll probably end up with leaks, wobbles, or bigger problems.
That’s why details matter right from the start—measurements, getting the drain lined up, making sure the countertop is stable, and hooking up water lines the right way. If you pay attention, most homeowners can install a vessel sink themselves, but it’s not a job to rush through. One small mistake with plumbing can ruin your day.
You’ll get practical installation methods, fitting tips, plumbing pointers, and ways to dodge common mistakes in this blog.
Good vessel sink installation is mostly preparation, not complicated construction; the vanity, drain opening, faucet position, and sink must work together.
For a typical vessel sink installation, gather the sink, compatible drain assembly, faucet, plumber’s putty or approved sealant, adjustable wrench, basin wrench, screwdriver, level, measuring tape, towels, and bucket. Some countertops also need a drill or hole saw.
Check the manufacturer’s fittings first. Not every vessel sink uses the same drain.
Place the vanity firmly before starting. Mark the drain centre and faucet position, then check the underside for drawers, braces, and existing plumbing. The sink should sit comfortably without crowding the faucet or wall.
For example, a narrow vanity may need a compact faucet because a large fixture can interfere with the bowl.
Don't Miss: Solid Wood vs MDF Bathroom Cabinets: Which Lasts Longer?
This vessel sink installation guide focuses on the order of work because sequence prevents unnecessary rework. Start with a dry fit. Set the bowl over the opening, position the faucet, then place the drain components without tightening them. Check that the drain lines up with the existing trap.
Next, remove the pieces, apply the required sealant, install the drain, secure the sink, and reconnect the plumbing. Do not force threaded fittings.
Follow the sink manufacturer’s instructions for drain hardware and mounting. Some vessel sinks are simply seated on the counter; others require a mounting ring or additional support.
The countertop must be strong enough for the sink and daily use. A heavy stone bowl should never depend on a weak or damaged vanity top.
Clean both surfaces before seating the bowl. Apply a small, continuous bead of bathroom-rated silicone where required, then position the sink carefully.
Do not use excessive sealant. Too much creates a messy edge and can make future removal difficult.
Vessel sink plumbing is usually straightforward, but the visible height of the bowl can make small alignment errors more noticeable. Connect the drain tailpiece to the P-trap while keeping the trap properly aligned. Tighten slip nuts by hand first, then give them a modest additional turn with a wrench.
The drain should not be under sideways pressure. If it is being pushed into position, something is misaligned.
For vessel sink drain installation, place the drain flange through the sink opening according to the supplied instructions. Use the correct gasket and washer arrangement; the order matters.
After tightening, wipe away excess sealant. Run water slowly and watch every connection underneath.
Install the faucet before final sink placement when access underneath will become difficult. Secure its mounting hardware firmly, but do not overtighten it against a fragile countertop.
Connect hot and cold supply lines, then open the valves gradually. A slow test catches leaks before they become cabinet damage.
Suggested Reading: Top 5 Mistakes to Avoid During Modular Bathroom Installation
Bathroom vessel sink installation becomes easier when every component is tested before permanent sealing.
DIY vessel sink installation is reasonable for homeowners who are comfortable shutting off water, using basic tools, and identifying a P-trap. It becomes less suitable when new supply lines, countertop drilling, or major drain relocation is required.
If the existing plumbing does not line up, stop. Cutting around the problem usually creates another one.
A bathroom vessel sink installation should leave enough counter space for soap, toiletries, and cleaning. Centring the bowl visually is not always the same as centring it functionally.
A practical test is simple: stand at the vanity and check faucet reach, bowl position, mirror clearance, and available elbow room.
A useful vessel sink installation guide should also explain what can go wrong, not only what to tighten.
| Installation choice | Better for | Main concern |
|---|---|---|
| Above-counter bowl | Modern bathrooms | Taller overall height |
| Recessed vessel | Lower profile | More countertop work |
| Pop-up drain | Easy daily use | Needs correct drain fit |
| Grid drain | Open vessel designs | Water may drain differently |
Use a compatible bathroom silicone or the sealant specified by the manufacturer. Apply it evenly, seat the bowl, then remove excess before it cures.
The seal is not there to compensate for a badly cut opening. It prevents movement and water intrusion; the physical fit still has to be correct.
After the vessel sink installation is complete, run the faucet for several minutes. Fill the bowl partway, drain it, then inspect the drain connections below.
Check again after a short wait. Tiny leaks can appear only after water has reached a fitting from several angles.
The right approach depends on how much existing plumbing can be reused.
| Factor | DIY installation | Professional installation |
|---|---|---|
| Existing drain lines are up. | Usually manageable | Still quick |
| A new countertop hole is needed. | Moderate difficulty | Safer choice |
| Plumbing needs relocation | Riskier | Better option |
| Simple faucet replacement | Usually manageable | Optional |
| Hidden leak concerns | Requires careful testing | More controlled |
The biggest mistake is tightening everything before checking alignment. Assemble the drain loosely, connect the trap, confirm the position, then tighten each joint.
For vessel sink drain installation, the drain opening, tailpiece, trap, and wall connection should form a natural path. If one piece is twisted sharply, revisit the layout.
Also Read: Installing Corner Bathroom Cabinets: Maximizing Space
Good installation is about fit, alignment, sealing, and taking it slow. Even though the sink looks simple, there’s a lot happening below the countertop. Always start by measuring, then dry-fit the drain, line up the faucet, and seal everything before locking it in place. Don’t force the fittings—if you have to muscle them together, something’s off. DIY works best if your existing plumbing lines up with the new sink.
If you need to move pipes or make bigger changes, it’s smart to call a pro. Your goal: A vessel sink that looks tidy on top and stays totally dry underneath. Water under the sink is a bigger deal than a little drip, so test the setup a few times before you call it finished. And for the first few uses, check under the counter to make sure nothing’s leaking.
Not always. The vanity has to hold the sink’s weight, have enough space for plumbing, and allow for faucet clearance. Too shallow or weak, and you’re in trouble.
Usually, yes. Because the bowl sits up high, you’ll probably need a taller faucet, or you can use a wall-mounted faucet if you want something different.
There is not a universal height that suits all bathrooms. The bowl also contributes to height; therefore, a low-lyingness may be more comfortable for some.
Yes, as long as no one glued it down like there’s no tomorrow. If you’re careful with the sealant and mounting, you can take it off without much trouble.
They can. Splashing depends on the faucet’s height, angle, water pressure, and bowl shape. Get those right, and splashing is a non-issue. Get them wrong, and you’ll be wiping up water a lot.
This content was created by AI